Today, we’re talking about video podcasting. This is part two of three, specifically how to prepare your video podcasting setup, the things you need to convert it from a podcast to an actual video podcast.
If you’re looking for my answers to why you should even be doing this, that’s in part one, Why You Should Have a Video Podcast. All the rationale and reasons are there to hopefully motivate you to get started.
3 EASY STEPS FOR VIDEO PODCASTING
I hope with today’s lesson, how to build your video podcasting setup, you realize how easy it can be for every podcaster to be recording their show. Not to become a YouTuber tomorrow, but at least to have the assets for you to use in the future for when you are ready. There’s no better time like the present to start.
I’m excited to go through this video podcasting setup for you. It’s really three easy components for you guys today. We’re going to be talking about the camera, the lighting, and your environment.
VIDEO PODCASTING SETUP ESSENTIAL #1 – THE CAMERA
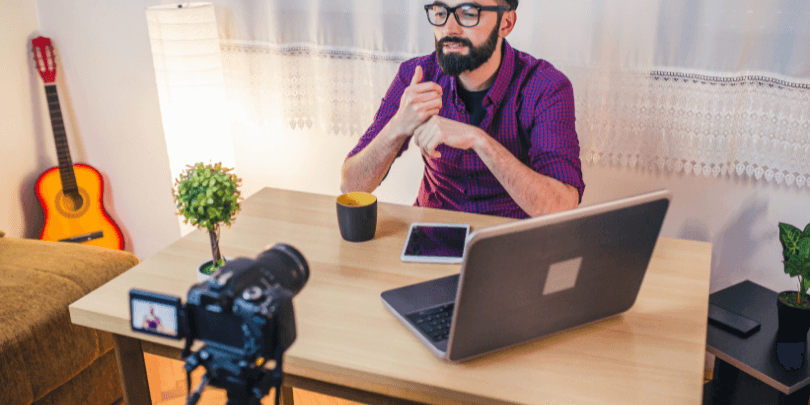
Let’s start with the camera. Obviously, if you want a video podcast, you have to have some kind of camera. For most of you beginning, you’re going to have a one-camera video podcasting setup. That’s going to be the camera right in front of you recording you as you are speaking into the microphone, looking right at your face with the background behind you.
Some of you might be bold enough to have a two-camera setup, which can be off to the side. That can give you a different angle so that your editors can have multiple angles to choose from to keep your show interesting.
For the camera you have in front of you, hopefully you can set it up a little further back than I have here today. Today I’m not working in the best environment. We are moving soon into a new house so I am in our little office, in the bedroom.
I have the light behind me, which is not ideal. Usually, it’s off to the side. I have nothing behind me that’s interesting. I can’t build a two-camera setup right now. The camera in front of me is too close, but we’re going to get it done. If you’re a podcaster, the job is just to get it done. Create the content and keep moving forward.
That’s what we’re doing today, but if you want a two-camera video podcasting setup, you can do that to give yourself a different angle. Also, if you set up your first camera to be in front of you and further back, you also give the editors opportunities to zoom in and out again, creating opportunities for more visually interesting content.
A VIDEO PODCASTING SETUP DOESN’T HAVE TO BE EXPENSIVE
The cameras that we’re talking about here don’t have to be fancy. I know a lot of people have DSLRs and things they set up. That’s advanced. For you to get started, really I want you to buy a simple webcam that you can put on top of your computer or on a tripod just behind your screen somewhere.
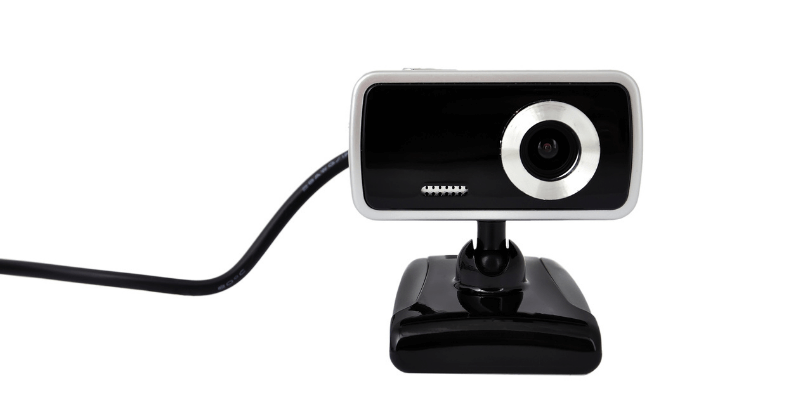
There are lots of brands out there, but one that’s very common and reliable is Logitech. I have the C920. They have newer versions of it with all different features, but as long as it’s an HD 1080P Logitech webcam and it can USB plug into your computer, you’re good to go.
It’s simple and easy. You can turn on your Zoom recording when you’re doing an interview, or when recording yourself solo. It automatically downloads that video for you. Very easy is the name of the game here when you are getting started.
Get the camera that works for you, hopefully a webcam that’s USB-based that has HD 1080P. Set it up in those ways and you’re done. That’s the easiest step you can take on this process. You can buy those on Amazon in the one hundred dollar range, maybe less, maybe more. However, it’s not a large investment for what you’re going to get out of it.
RECORD NOW AND HAVE CONTENT LATER
Now you have a new asset that you can use over and over again to create not only YouTube videos, but also social media clips that are way more engaging than audiograms and those graphical things that you are doing already.
You can take actual video footage, clip it and drive traffic to your content. Use the assets you have in front of you. You’re creating the content anyway. Why not just turn the camera on, push the button and have it capturing that as well.
VIDEO PODCASTING SETUP ESSENTIAL #2 – LIGHTING
Video podcasting setup essential #2 is your lighting. Right now, all you need is to make sure you’re in a room where the light is off to your side or in front of you, like a nice window. For a lot of people, that is enough. However, for most of us, we’re going to have to adjust the room we’re in.
For about $20 or less, you can get a little standup LED light. You can put it off to the side and that will light you from the front so that your face isn’t all blacked out. Right now in my room, I have a full window behind me with sheer curtains. It’s really bright. Without a light, my face would be totally blacked out, dark and shadowed.
Since I have a little light in front of me that’s no bigger than six inches by four inches on a little tripod off to the side, it lights me up from the front. You can see my face, and that’s enough for the camera.
CORRECT LIGHTING CREATES A BETTER VIDEO
That lighting is the difference. Yes, the higher the quality of camera you get, the better the image might be. However, what people don’t realize is a simple webcam can create very crisp footage, especially if it’s 1080P. The difference between a good-looking video and a bad-looking video (most of the time) is the lighting, not the camera, especially if you hit that minimum requirement.
If you get that lighting, suddenly you’re going to be lit better. You’ll have a crisper video, which is what you’re thinking of when you think of high quality. It’s not pixelated, it’s crisp. There’s some contrast. You stand out and are vibrant. It is all driven by lighting.
That first little light you have is helpful. A lot of people get ring lights. That’s what I started with as well. I usually like having (again, off to the side,) a big ring light. You can go ten inches; you can go bigger than that. I’ve heard larger than your face is better, so twelve or fourteen inches.
Again, they’re not very expensive. You have them set up at an angle, like a forty-five-degree angle off in front of you so that it’s not being reflected in the camera. You set it off right there and you get the lighting you need for your face.
I know some people put their camera right in the middle of the light. That’s okay, too. It puts the ring of the light in your eyes, which is good or bad. Some people like it, some people don’t. I don’t mind it off to the side for me. That lighting is going to be all you need.
You can do even better and blackout the room behind you. Get some blackout shades, (which is what we usually have,) and put that behind you so it’s dark. Then only the light is coming from the front. That’s really what’s going to drive the quality of the image of the video.
START SIMPLE AND THEN EXPAND
Even better, once you get those couple of things going and you do have a dark room, you can get interesting. Then you can buy these LED lights with color slides. Put some interesting blue or red color behind you, which a lot of people do, to add a little more visual interest.
That will take you to that next stage of it looking professional, instead of what I’m doing now. It looks like I’m in a bedroom because I am. That’s not super professional, right?
However, I’ll tell you all of this is better than trying to hit the green screen button and getting a really pixelated picture behind you. Every time you move, there’s this ghosting that happens where you kind of see the background behind you and you kind of don’t. It’s just terrible quality. I’d rather you be in a bedroom than have that behind you.
You have to do what you have to do. Maybe you get a curtain, something to stick behind you, or a fake facade background. In an ideal world, you get the lighting right. If you can sit in a corner where the walls are directing towards you, that’s even better where the line of sight is drawn towards you.
VIDEO PODCASTING SETUP ESSENTIAL #3 – YOUR ENVIRONMENT
The #3 essential item for your video podcasting setup is your environment, aka your background. What I would love is if you can set something up where you go every day.
You sit down and you don’t have to do anything except turn things on. Everything is where they’re supposed to be every time so that you are excited and confident about creating content when you are ready.
I don’t want you to have to set everything up again, take it out of the closet, and put it where it needs to be. That’s going to slow you down, number one, but number two, half the time it’s going to keep you from even wanting to create that content or turn those cameras on because of the hassle.
If you can find somewhere you can stay still and have a video podcasting setup that doesn’t move, that’s going to be your best bet, no matter where it is. Pick a room, pick a place that is yours, that you can own. You can then start adjusting things and figure out what can you put behind yourself that looks better.
“What can I do for the lighting to darken it or to get the lights in the right places? What can I do to put the microphones in the right place so you can still see my face?” All of these decisions you can make because you now have a stationary environment to work with.
RELATED: Build your personal brand with the Content Marketing Starter Guide.
WORK WITH WHAT YOU HAVE
Even in this move that I’m going through, I knew that I was going to have to work with this situation. So I am. I have my microphone here, a little sound blocker off to the side, and have the light in front of me. It’s good enough. It’s getting the job done. As long as you have something like that to work, you’re going to be good to go.
Controlling that light is going to be key. Obviously, that’s number one. However, another thing about your environment is also controlling the sound. Find a place where you don’t have to do too much sound control.
In other words, find a place where you don’t have the dogs barking next door, where you don’t have a lawnmower turning on half the time, or a weird ticking sound. Whatever the things are that are in your environment (like the air conditioner turning on,) try to control your environment so that your sound is mostly fine.
As long as you have a dynamic microphone, like the one I’m using right now, which is the ATR 2100, your sound should be fine with just the four inches in front of you. I don’t have to do soundproofing. I just have to use the right microphone.
VIDEO PODCASTING SETUP ELEMENTS WORK TOGETHER
You want all this to work together. Again, if you’re in a room where you can’t fix what’s behind you, then you can invest in getting a screen behind you for your video podcasting setup. That will at least create a flat surface that is more interesting to look at than a bedroom.
I’ve invested in those when I’ve needed them. This time around, since this is a temporary situation, I’m not worried about it so much.
Invest in those little things. Then you’ll get more and more confident about recording that video and getting that the quality footage you’re looking for. If you can, arrange your environment in a way that actually brings out your personality.
That’s a bonus tip. I would love you to have some character going on behind you, where you have some shelves or something on your wall. It’s not too cluttered, but enough that it adds interest and brings out the character, your personality, in the background.
If you can, do something like that. I think you’re going to be more and more proud of the video you’re shooting. As you get more comfortable doing it, you are going to be more likely to want to put your video out there and get it edited.
NEED PODCASTING IDEAS TO GET STARTED?
Check out my article covering 10 Podcasting Ideas for Beginners to help you get started!
CONNECT WITH BRANDON
Follow me on INSTAGRAM or…
If you’d like more content about how to build your personal brand, check out my free Content Marketing Starter Guide.
- Don’t want to miss the next thought leader interview? Subscribe to the free B-team Insider Newsletter! And don’t forget to leave a rating and review on iTunes.
Talk soon!